
Animate a layer
There are three ways to add motion in Mixture, and they all land on the same timeline — so you can mix them freely on a single layer.
Quick Animations
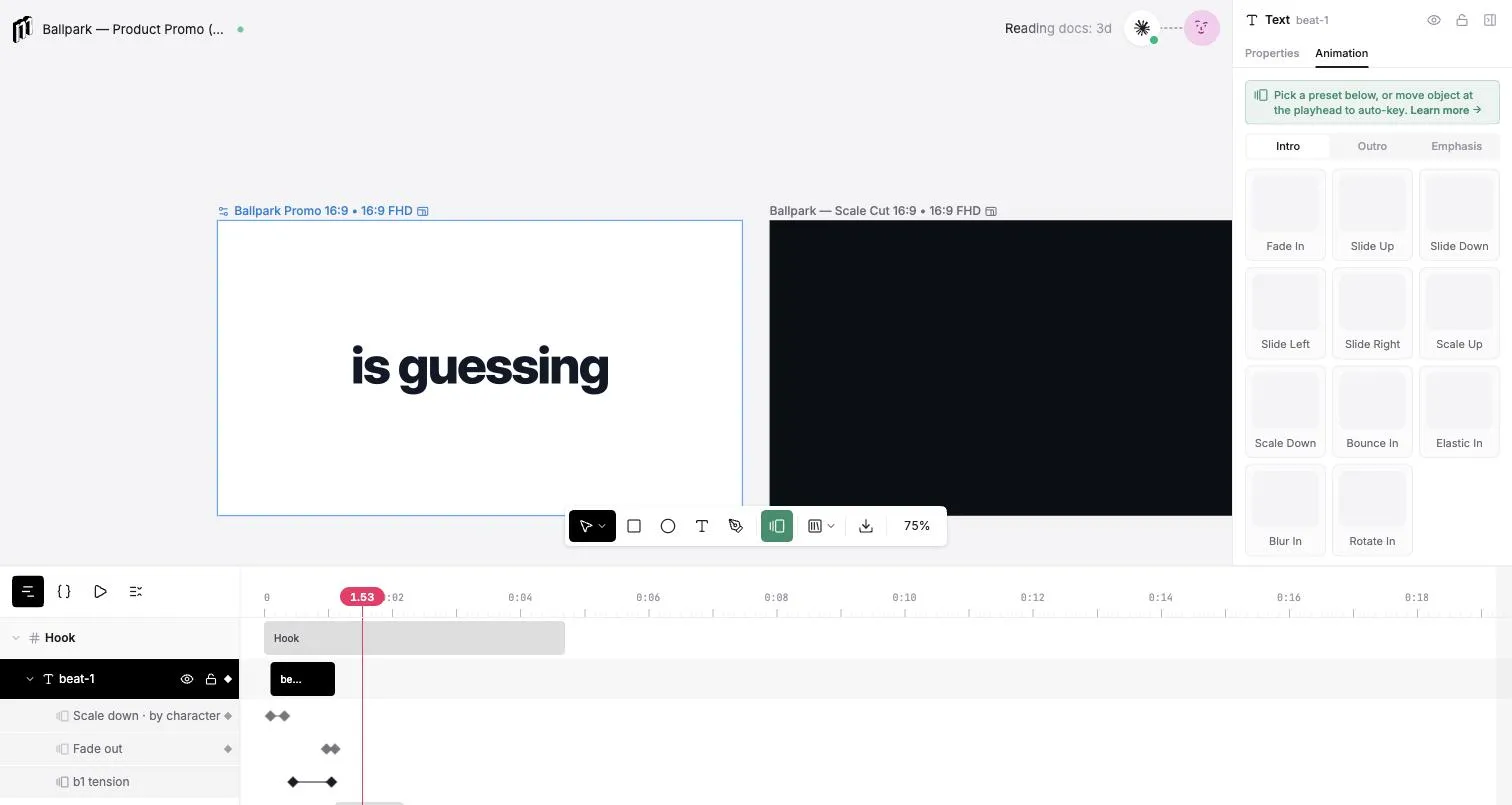
Section titled “Quick Animations”Select a layer, turn on Animate at the top of the properties panel, and the Quick Animations grid appears. Each preset applies with one click, grouped into three kinds:
- Intro — how a layer enters: Fade In, Slide Up / Down / Left / Right, Scale Up / Down, Bounce In, Elastic In, Blur In, Rotate In.
- Outro — how it leaves.
- Emphasis — motion that draws attention while it’s on screen.
Describe it with ⌘K
Section titled “Describe it with ⌘K”Press ⌘K to open the animate palette — a small prompt box over the canvas. Describe the motion you want in plain language and Mixture turns it into an animation on the selected layer. It understands chains (“fade in and then scale up at 2s”), music (“pulse on every beat”), as well as colours and filters. Each phrase is highlighted as it’s recognised, and the result lands as a named animation you can edit or delete later.
Keyframes
Section titled “Keyframes”For precise, hand-tuned motion, use keyframes. With Animate on, move the playhead to the moment you want, then either change a property in the panel or adjust the item directly on the canvas — its position, size, rotation, colour, and so on. Mixture records a keyframe at that time. Move the playhead again, make another change, and you’ve defined motion between the two.
Keyframes appear as diamonds on the layer’s property lanes in the timeline, and each keyframed property is marked in the panel. Select a keyframe to edit its exact value and its easing — choose from the built-in curves or set a custom one — and drag a position keyframe’s path on the canvas to shape how the layer travels.
Expand a layer in the timeline to see its animation: one lane per keyframed property, each keyframe a diamond you can drag in time.
Here that circle has keyframes on its position, size, and colour — playing the timeline moves it along the path and grows it from grey to blue:
Fine-tune anything
Section titled “Fine-tune anything”Select any animation, whether from the panel list or on the timeline, to change what it does and how it eases. Because presets, ⌘K prompts, and keyframes all compile down to the same timeline, you can layer an entrance, some emphasis, and a few hand-placed keyframes on one element and tune them together.