
Effects, filters and custom shaders
Three related systems make up Mixture’s “looks” toolbox, from mild to wild:
- Effects — the classics on any layer: drop shadow, blur, colour adjustments.
- Filters — GPU post-processing over a layer’s rendered pixels, with a time window: halftone, chromatic aberration, colour grades, glass.
- Shaders — generative layers that are their content: animated gradients, grain, noise panels.
All three are tunable in the properties panel, and the last two accept your own WGSL code. A word of taste before the tour: these are this medium’s unfair advantage, and the fastest way to waste it is to use all of them at once. One signature effect per piece goes a long way.
Effects
Section titled “Effects”Select a layer and open the Effects section’s + menu:
- Drop shadow — colour, offset, softness, spread. Text layers get a text shadow with the same controls.
- Layer blur — blurs the layer itself.
- Background blur — frosted glass: blurs what’s behind the layer, clipped to its shape; a Blend dial sets the glass opacity and the layer’s fill tints it.
- Colour adjustments — brightness, contrast, saturation, hue, grayscale, sepia.
Each active effect is a row with its own controls and a × to remove it. Effect values are animatable like any other property — a shadow can grow in, a blur can resolve to sharp.
Filters
Section titled “Filters”Filters live in the same + menu, under their own group. A filter runs over the layer’s finished pixels on the GPU — and unlike an effect, a filter has a time window: it starts, runs, and ends on the timeline, with optional fade-in and fade-out. That’s what makes a two-second glitch punch or an intro-only colour grade a normal thing to author rather than a hack.
The built-in presets:
- Tilt shift (DoF) — photographic depth of field. A sharp focus zone
with a smooth disc blur falling away from it, in three modes: Band
(classic tilt-shift — blur both sides of a focus line), Far side
(only the far side softens), and Radial (a sharp pocket with blur
growing outward in every direction — the macro-lens look for product
hero shots). Focus, band width, blur radius and angle are all
parameters, and all animate — rack focus across a scene by animating
focus, or swellradiusthrough a fast move so the blur breathes like a real lens. Radius is resolution-independent: the same value reads the same at any composition size. - Blur — a plain, even lens defocus over the whole layer. The general de-emphasis tool: soften a background while a hero element is up, frost a panel, or resolve an entrance from soft to sharp with a fade-in.
- Motion blur — see its own section below; the modes behave very differently and picking the wrong one is the most common way this filter disappoints.
- Chromatic — chromatic aberration / prism split. Subtle at low intensity, deliberate prism at high.
- Fluted glass — reeded-glass refraction with adjustable rib angle, ripple and iridescence.
- Halftone — printing-press dots, mono or classic CMYK comic look.
- Colour grade (LUT) — bundled looks: modern cinema, warm, cool, teal-orange, faded film, vintage, moody portrait, high contrast, black & white, sepia.
- Liquid — smooth water ripple or turbulent heat-shimmer distortion. Also the partner for a shape morph: run it over the same window and the change reads as one substance flowing rather than an outline sliding.
And three that read the real depth of a 3D scene — put them on the 3D scene layer itself, since a 2D layer has no depth for them to read:
- Depth of field — true optical focus, set as a distance into the scene, so a rack focus stays locked to the geometry as the shot moves. (Tilt shift fakes the same look from a screen-space band; see which to use when.)
- Depth fog — haze that thickens with distance, so far content recedes regardless of where it sits in frame.
- Rim light — relights the scene after rendering, from its surface normals, so a contour highlight wraps the geometry and travels across it as the scene turns. A 2D gradient can’t do that, because it has no idea which way a surface faces.
Every filter row has a ⚙ popover with its parameters — each preset gets its own labelled, ranged controls — plus the start/end times and fades. You can also drag the filter’s window directly on the timeline. A layer can carry several filters, including repeats of the same preset with different windows.
Filters apply to any layer type, groups included — a filter on a group runs over the composited children, so one halftone can treat a whole card as a single print.
Two honest caveats:
- Filters need WebGPU — and Mixture checks that for you. The editor verifies WebGPU and video codec support up front and won’t open in a browser that lacks them, so if you’re in the editor, filters work. The only exception is choosing “Continue anyway” on an unsupported browser: there, layers render without their filters rather than breaking.
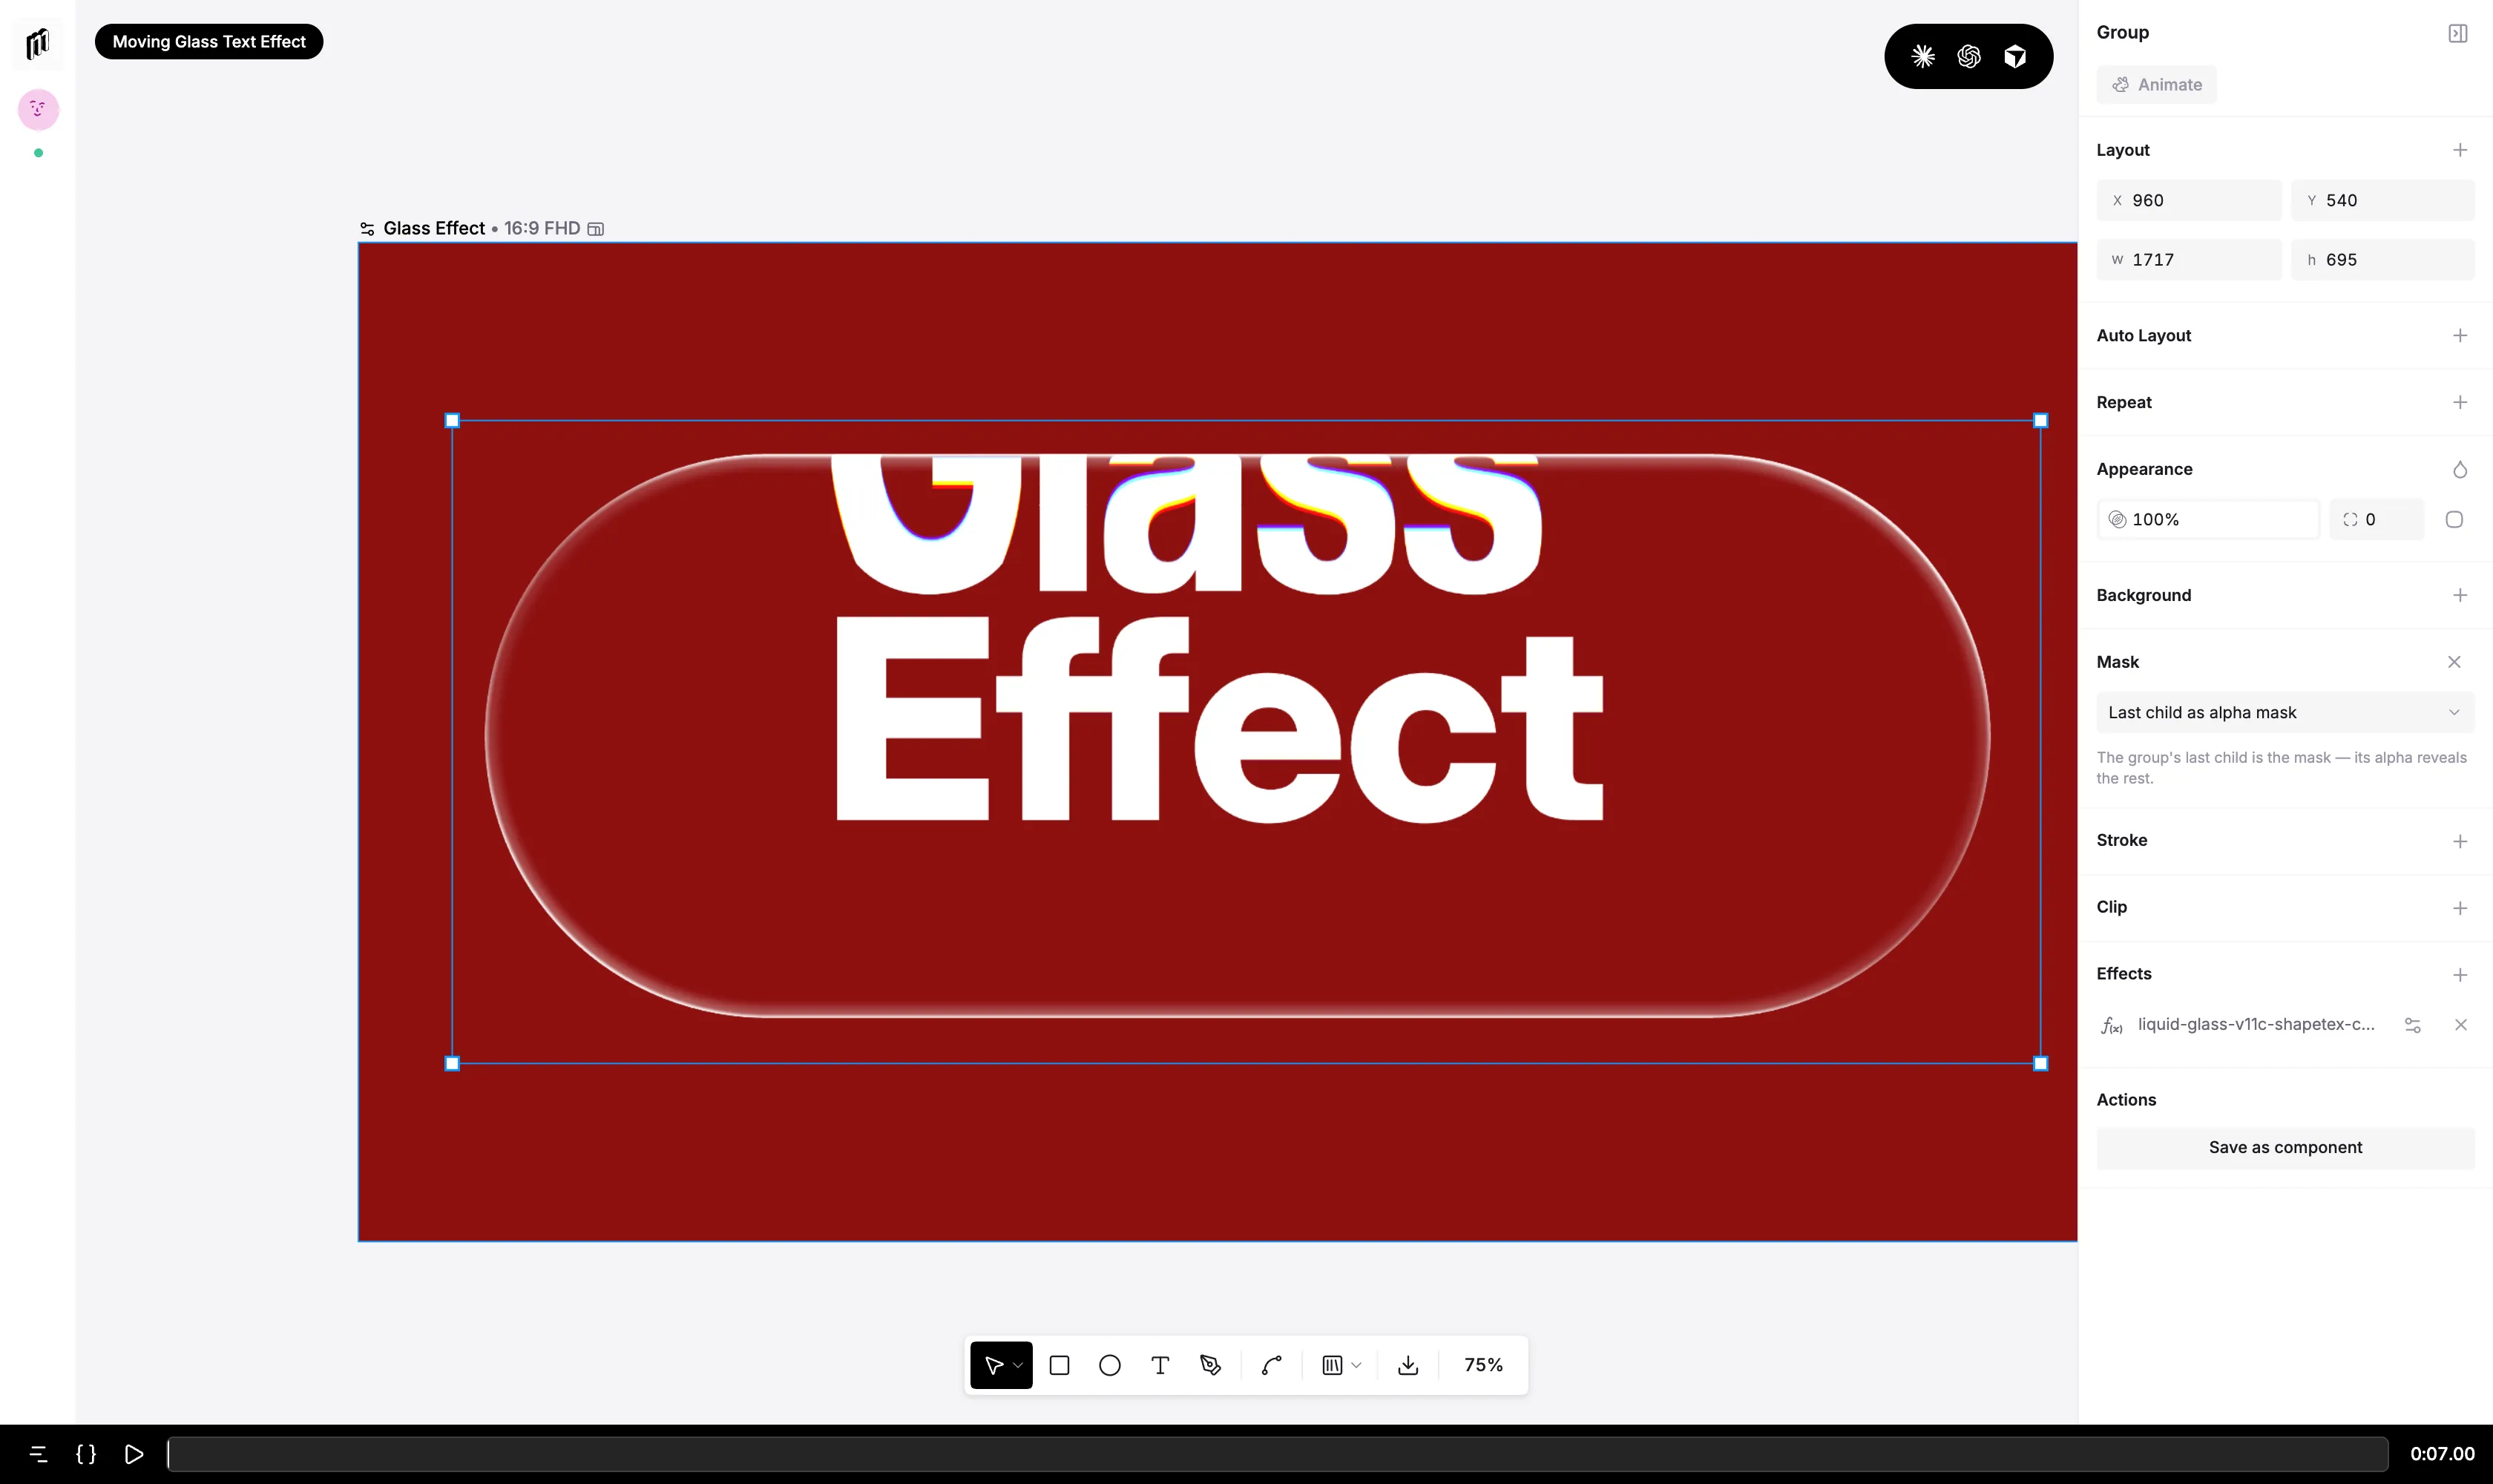
- Keep filters off text at readable sizes — halftone and glass destroy glyph legibility. They’re for imagery, video, and shapes.
Motion blur and its modes
Section titled “Motion blur and its modes”Motion blur is really two different filters wearing one name, and almost every complaint about it comes from having the wrong one selected.
| Mode | What it does | Reacts to actual movement? |
|---|---|---|
| Auto | Blurs along the layer’s real measured motion — position, roll, 3D spin, zoom dolly — per pixel | Yes. Exactly zero when the layer is still |
| Radial zoom | A constant smear streaking outward from a focus point | No |
| Horizontal | A constant horizontal smear | No |
| Vertical | A constant vertical smear | No |
| Diagonal | A constant diagonal smear | No |
Auto is the one you want
Section titled “Auto is the one you want”Auto is the default and it’s what “motion blur” normally means. It reads how the layer is actually moving on each frame and blurs along that vector, which means:
- It’s zero when nothing moves. Nothing to time, nothing to fade.
- One filter spanning the whole scene replaces a stack of hand-timed pulses. No windows to synchronise against each move.
- Scrubbing never catches a blur mistimed against its motion, because the blur is the motion.
In Auto, intensity is a shutter angle, not a blur amount. 1.0 means a 180° shutter at 30fps — 1/60s of exposure, the film norm. Stay in 0.7–1.0 and it reads as photography. It’s clamped at 1.0, so there’s no “more blur” past that; if you want a heavier smear you want a manual mode, and you probably don’t.
The manual modes are a look, not physics
Section titled “The manual modes are a look, not physics”Radial zoom, horizontal, vertical and diagonal apply a fixed smear that ignores whether anything is moving at all. A layer sitting perfectly still with a manual motion blur on it is simply a blurry layer.
That’s the trap: they look “wrong for no reason” because they’re doing exactly what they were told, on a frame where nothing is happening.
Use them only when the blur is deliberately a stylistic effect — a radial zoom streak on an impact frame, say — and then:
- Keep intensity low: 0.12–0.25, never 0.5+.
- Fade it tight around the move with the filter’s fade-in and fade-out, so it’s gone by the time the shot settles.
Radial zoom also has a Focus point — the centre the streaks radiate from. Point it at whatever you’re punching in toward; left at the middle of a frame whose subject is off-centre, the effect reads as a mistake.
Shader layers
Section titled “Shader layers”A shader layer generates its pixels from code instead of from a file. The canvas toolbar’s Media & Components menu has a Shaders submenu with the presets: Mesh gradient, Soft gradient, Aurora, Plasma, Waves, Liquid, Noise, Dot grid and Grain.
The first seven are animated backgrounds — a living gradient behind a launch hero. Dot grid and Grain are texture panels: static by default, one layer where a real design would carry texture. Restraint applies double here; most professional videos use clean backgrounds, and two or three muted colours from the same family beat a rainbow every time.
Select a shader layer and the Shader section tunes it: Speed and Scale dials, and the colour palette the shader blends between (two to six colours — the section’s + adds one). Scale is keyframeable.
Shader presets preview on a CPU fallback path when WebGPU is missing — at reduced resolution, fine for editing.
Write your own: custom WGSL
Section titled “Write your own: custom WGSL”When a preset won’t do, write the fragment shader yourself. Both systems
accept custom code as an asset: drop a .wgsl file into the project’s
assets view. Mixture reads the source to decide what it is —
- code that samples
inputTex(a layer’s rendered pixels) becomes a filter asset, and shows up in the Effects + menu under My filters; - anything else becomes a shader asset you can insert as a generative layer from the assets picker.
You write only the fragment function. The platform provides the uniforms (resolution, deterministic scene time, intensity, your colours), noise helpers, and — for filters — the layer’s pixels, its mask silhouette, and even the scene behind it, which is how a true liquid-glass refraction is built. Compile errors surface in the properties panel, and the layer falls back to its preset instead of going black.
// @param — code becomes controls
Section titled “// @param — code becomes controls”The part that makes custom effects feel native: declare each tunable value as a comment line at the top of the file —
// @param strength label="Strength" type=percent default=0.35// @param ripple label="Ripple" type=float min=0 max=8 default=3// @param tint label="Tint" type=enum options="0:None,1:Warm,2:Cool" default=0— and the editor parses them at upload into the effect’s settings panel:
labelled, ranged, correctly-widgeted controls (sliders, steppers, toggles,
dropdowns), live-scrubbed like every built-in. Without @param lines you
get generic intensity and speed sliders only. Types cover float, percent,
angle, int, bool and enum; filters may declare up to 4 params, shaders up
to 32. A malformed line never fails the upload — it’s skipped, and you can
fix and re-upload.
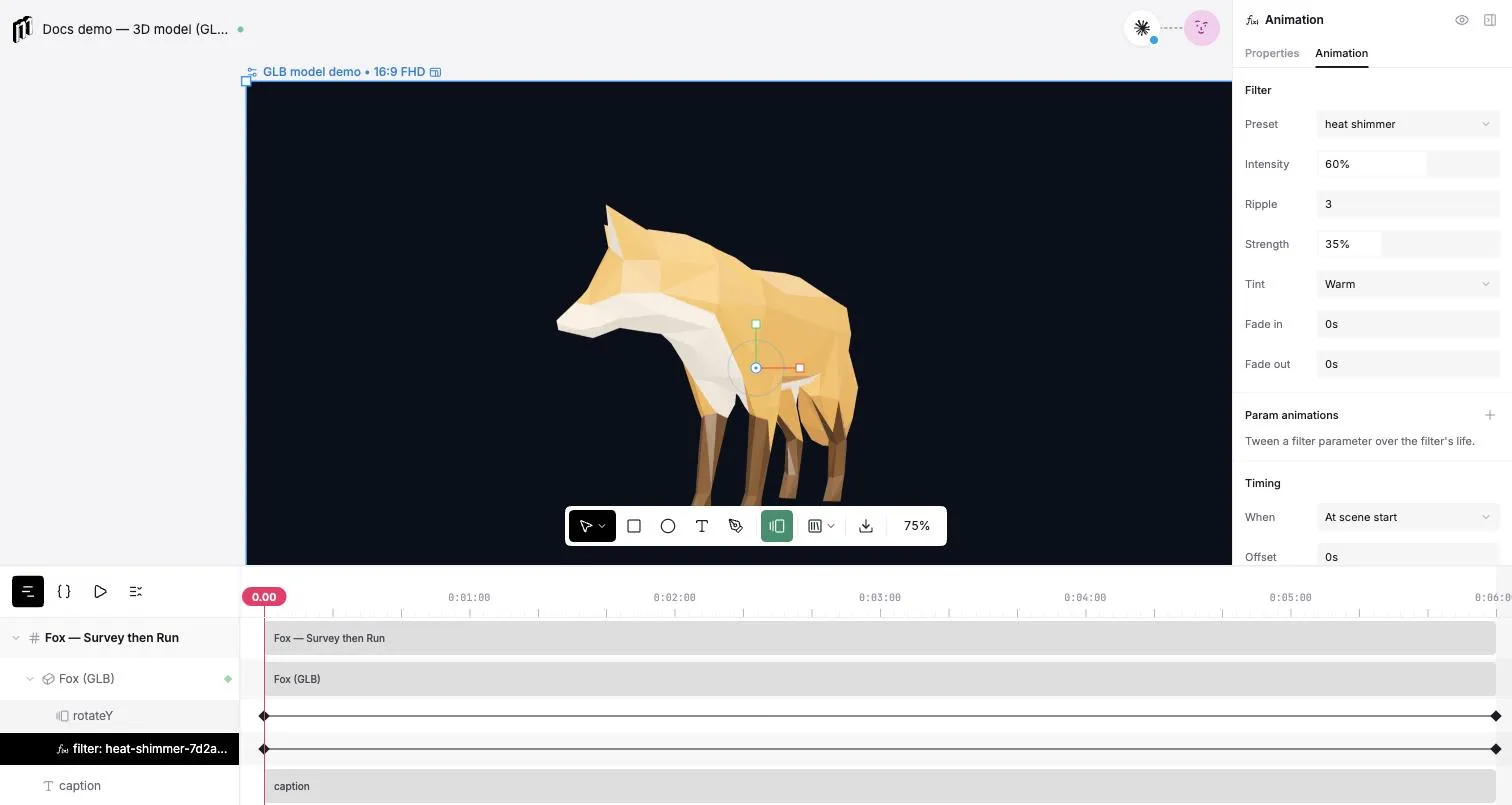
Filter params are animatable too: a custom “crack spreads across the screen” filter is a param plus an animation on it.
The honest limits
Section titled “The honest limits”- WebGPU only — enforced at the door. The editor’s browser check guarantees WebGPU before you ever reach a shader, so in practice custom WGSL always runs. Only an unsupported-browser session that clicked “Continue anyway” sees the preset fallback instead.
- WGSL is not GLSL. The two common porting traps: you can’t assign to a
swizzle (
c.rgb = xwon’t compile — build a new vector), and there’s no implicit int-to-float conversion. - Cost is real. Every filter is an extra GPU pass over the layer. A couple on screen is fine; a stack on every layer will show up in preview smoothness on modest machines.
- Shader and filter sources are capped at 64KB, and code can’t touch the network or the page — a shader asset is inert text until the GPU compiles it.
Bring your own AI
Section titled “Bring your own AI”Everything here is documented to agents too — including the full WGSL authoring contract, which is genuinely the comfortable way to use it. Connect a coding agent and ask:
- “Give the product shot a subtle chromatic aberration for the first two seconds.”
- “Write a heat-shimmer filter with strength and ripple controls and put it on the background video.”
The agent writes the WGSL, declares the @param lines, uploads the asset
and applies it — and you get a settings panel you can tune yourself.
Coming from Shadertoy or GLSL?
Section titled “Coming from Shadertoy or GLSL?”Mixture shaders are WGSL (WebGPU’s language), not GLSL — a pasted Shadertoy shader won’t compile as-is. You don’t need to learn the differences: paste the GLSL to a connected agent and ask it to port it. The translation is mechanical (rebuilt swizzle writes, explicit float conversions, uniform mapping) and the agent turns the shader’s tweakable numbers into proper param sliders on the way through.
Why WGSL-only, honestly: WebGPU is the faster, modern GPU path — the shader language isn’t what performance comes from, and a second GLSL pipeline would mean every custom shader behaving subtly differently on two backends. One language, one behaviour, and AI as the translator.
Ask AI for a new effect
Section titled “Ask AI for a new effect”You don’t have to write WGSL yourself. A connected agent can write a brand
new filter or shader on request — “make me a VHS tape filter with tracking
noise”, “a slow liquid-glass shimmer” — and upload it straight into the
project, where it appears in your effects menus like any other custom asset,
@param controls included. Describe the look; the code arrives as an asset
you can reuse, tweak and keep.
Images work the same way (agents generate bespoke backdrops and textures on demand), and 3D models can be supplied through the same door — see Work with agents.